Showing posts sorted by relevance for query glm01. Sort by date Show all posts

Wednesday, August 2, 2023

Lucky's Trekking Tips - Muzzle Blasts, May 2023

What's Cooking? One of the most frequent questions we get about our Ashley’s Return trek is about the food we carried and how we ate. Over the years I have tried many different things from carrying some form of original stable bread, to jerky and even pemmican. The disadvantage we have today is our inability to hunt wherever and whenever we go to the woods for a trek, whether for a weekend or 95 days.

In today’s world we must follow hunting and fishing seasons and based on our jobs and time off available, cannot always trek during a hunting season. The main stay of Longhunter’s, fur trappers and soldiers was always meat in some form. I read one account that one soldiers daily ration in the Revolutionary War was 7 squirrels. In the end, that is not a lot of meat, but it is a lot of shooting for a forager!

We carried a couple sets of food. Starting off with breakfast we made a simple bucket of coffee. The night before the bucket was filled with water, coffee dropped in it to soak overnight and then boiled in the morning. While the coffee was on to boil, we each made a simple breakfast of oatmeal. To that we added dried fruit and nuts. This, to me, is the perfect breakfast. No mess of carrying and cooking bacon and no digestive issues while trekking. As a bonus, oatmeal is light in weight to carry and staves off hunger well. During the day, for lunch, we passed around the bag of dried fruit and nuts to snack on. Amazingly, it is filling and gives great energy to get through to dinner.

Prior to eating dinner, we ate what our companions called “pupu’s”, Hawaiian for appetizer. It consisted of cut up raw cabbage, garlic, onion, ginger, and cheese. All these last a long time on the trail. Cabbage can last up to a month. These are a great combination to settle the stomach and help regulate the digestive system. This was enjoyed while one of us cooked a stew with the fresh meat we carried.

The raw meat was wrapped in cotton, then put inside the cooking bucket and put in the pannier on the pack animal where it would be out of the sun and heat, mostly. Each night we would stack all the meat on top of the cooking tripod to slowly smoke to preserve it. Meat carried in this fashion can last up to 16 days. For a weekend trek it is a great way to go. The meat was cut up and mixed with dried or dehydrated vegetables and the spices we carried to form a stew. Dehydrated vegetables are excellent to carry. Depending on what you buy, they hydrate rapidly, have great nutrition and once again, are lightweight.

A simple weekend trek or event menu for one person would be half cup of oatmeal, a pound of dried fruit and nuts in a bag, half pound of fresh meat per day and 2 cups of dried/dehydrated vegetables, spices of choice and of course, enough coffee to keep that headache away! Next month I will detail the food storage bags and how to carry your provisions the way we did. I hope this helps you plan your next event and I hope to see you around a fire.

  • Some Favorite Trail Foods by Bob Spencer. Click here.
  • Making Jerky: Click here.

Written by Gerry "Lucky" Messmer. Reprinted with permission from the author.

Code: glm01

Wednesday, July 12, 2023

Lucky’s Trekking Tips - Muzzle Blasts, February 2023

Bedrolls: This month I’ll tackle sleeping while trekking, whether on foot or horseback. I like to keep my gear very simple, multi-purpose and as light as possible. Doing a fur trade era impression, I tend to use a poncho, that gives me rain protection for both me and my gear. Addition ally, I use a wool poncho that doubles as a wearable poncho for warmth while traveling and a blanket at night. 

Typically, I flat camp and do not carry a “diamond wedge”. I cannot find documentation making them proper in fur trade use or even on trade lists. That doesn’t mean tarps weren’t tied up by the corners. Did they carry tents? I am sure some did until they wore out or were stolen, but they also built open face, three wall cabins to hold out in during the cold winter months. While traveling I am sure that they flat camped most of the time. In Osborne Russell’s journal he notes coming into camp where 19 of 23 men did not even have a blanket in January, but were instead, curled up around a large fire for warmth. 

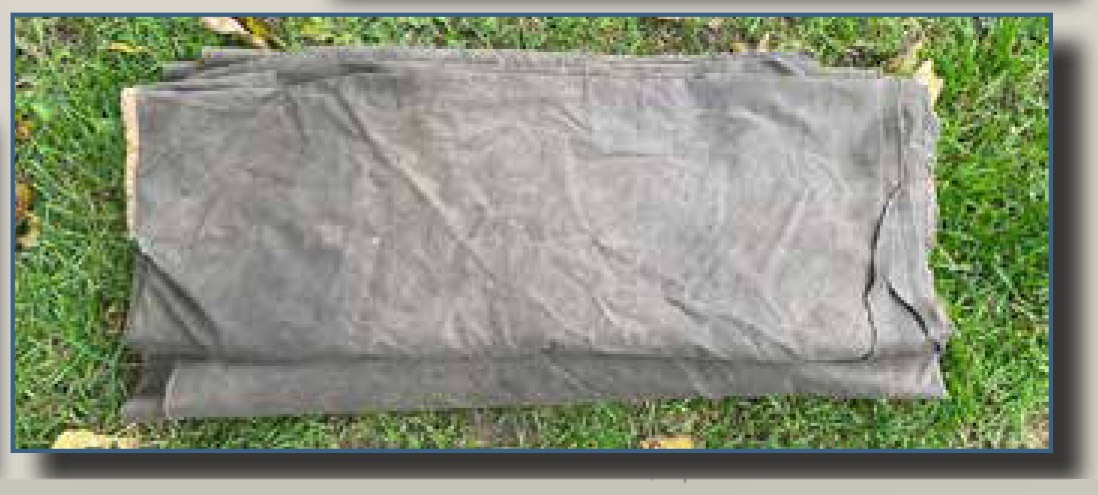
My “sleeping kit” is simple. My ground cloth is my personal rain poncho that has a trimmed hole in the center to pull over my head. It is 7 feet long and 56 inches wide. When I am riding my horse, I also have a piece of oil cloth that hangs over the horn and can be opened to cover the saddle and gear tied to the cantle. When I have the poncho on, the water does roll off me, my gear and my horse. Next is the wool poncho, 80 inches long by 60 wide that is folded in half the long way and laid in the center of my ground cloth. This has two functions, first as a cushion and second as a barrier to the cold ground. This is followed by my wool blanket folded in half the long way again, to accommodate for my height, and finally my top oil cloth. The last picture is all these items folded up and ready to be tied to my cantle on the saddle or put into a pack to be carried on my back. When folded up for the saddle this entire package is 30 inches long x 13 inches wide x 5 inches thick. 

Other things to keep in mind when trekking by horse are the use of your saddle blanket as a sleeping pad and a second wool blanket as a saddle blanket, that can be used for sleeping. Typically, I put the thick saddle blanket under my upper body and then the second wool saddle blanket that goes over the pad is used as an additional layer on top. They may smell a little horsey, but they are worth their weight in gold and help eliminate extra gear and serve as “dual purpose”. 

Once again, keeping it simple is what I have found works the best for me and multi-use is imperative in cutting down weight and bulk, especially if trekking on foot. I prefer thicker oil cloth as it is more durable. Another consideration could be to use a large “diamond fly”, if you are set on using one, as your top and bottom cover by folding it in half and then in rainy conditions for a shelter. In most rain situations I simply wear my poncho until I am ready to sleep and then make up my sleeping arrangement or sleep with it on sitting against a tree. It’s not ideal, but conditions in the fur trade era never were! 

I hope this helps you in some small way to minimize your sleeping gear and to get more focused on lightening your load.


Additional posts on the subject can be found here:

Written by Gerry "Lucky" Messmer. Reprinted with permission from the author.

Code: glm01

Wednesday, May 7, 2025

Lucky's Trekking Tips - Muzzle Blasts April 2025

By The Light Of The Moon: The 1960s rendezvous era brought a lot of “stuff” into the marketplace. Everything from the dreaded “priming horn” to “trekking lanterns”. Not to be a hypocrite, as honesty is the best policy, I have been known to carry one from time to time. The one I have carried is tin that folds and holds a small candle. However, I have stopped carrying it as I work to maintain my period correct impression.

The reason I choose to stay as period correct as possible is that my goal is to do things just as they did with only what we know they carried. From everything I have read, generally, they carried very little compared to what we carry and “think they carried.”

During our Ashley’s Return trip, we did not carry candles and did not need them. When trekking on foot, horse or some form of boat you will travel from sunup to sundown and by the time you are done you are out of energy. A good fire will suffice to give you all the light you need to set up your bedroll or enjoy a good pipe while telling lies. If you really need to do some sort of repair to your gear, simply stop early for the day and use sunlight.

For me, it is all about, less is more, as I have stated before in these trekking articles. A lot of people pack “stuff” thinking they will get something done at night. One example is a main spring vice that people like to carry. I own one, have used it a couple times in my shop, but in all the miles and days I have logged on the ground I have never needed it in the woods, or even carried it.

Remember, for the fur trappers most outfits had a blacksmith with them to do repairs. Longhunters probably did not carry gun parts or do repairs in the woods that often, but I can’t really defend that statement, it is just an opinion until I research it more. Also, they were not out as long as the fur trappers of the 1830s. I would be afraid to work on my lock at night by simple candlelight. One lost screw and you have a fancy club!

If you really need light, build a teepee style fire as it gives off the most light and is better than a small candle. Also, back then walking around the woods with a candle would be quite the beacon to jeopardize security.

This month’s challenge: Next time you take to the woods leave that “trekking lantern” or candle behind and stop early if you need light or use the light of a fire. Quite frankly, I think you will soon learn that the lantern and candle are not necessary. Less is more. The picture shows about all I do in camp after building a fire and cooking a meal!

As spring nears it is time to get your packs ready, make your plans to get into the woods and I hope to see you around a fire.

Written by Gerry "Lucky" Messmer. Reprinted with permission from the author.

Code: trk01 glm01

Saturday, December 7, 2024

Lucky's Trekking Tips - Muzzle Blasts December 2024

Dogs: ​Here is a fun trekking topic. Dogs have always played a role in our history, and they are always talked about in journals, on farms and as companions. We have owned many doges over the years, but my favorite has been a terrier mix named Sprinkles that many of you have met. He frequently accompanies me into the woods on treks of any length, even on one day hunts.

As always, check your local laws about having a dog with you on a hunt of any game. Lucky for me, I can sit on the ground hunting for hours along a game trail and Sprinkles will not get up until I shoot. Then he wants to see what happened but will not move from my side until I get up and then only to follow me.

I really enjoy a dog in camp as they can be quite entertaining and if yours is like Sprinkles, a great guard dog who makes friends with everyone. When Sprinkles comes, he eats what I eat. I don’t pack extra food, and he drinks water out of my cup. I have heard it said that a dog’s mouth is cleaner than ours, so we simply share. I haven’t gotten sick yet, nor has he from me!

Make sure your trekking partners are ok with it and realize, a dog is a dog and unless very well trained, will act like a dog. I was in a camp where a couple dogs ate several pounds of jerky out drying in the sun on a rack. No one got upset. They failed to guard their drying racks, and the dogs did what they do, eat.

Sprinkles is not super trained, but he is super loyal to me. When I sleep, he stands guard most nights or sleeps facing out right inside my bedroll. Quite regularly he will dash out to reply to coyotes and mark a circle around my camp, not giving a second thought to him being a quick snack for them. He is a great alarm as well. Dogs will always be protective of their master and in camp provide a superb early warning for anything approaching.

I have never been concerned about having a “period correct” breed of dog. Quite frankly, Sprinkles has no idea what year it is and if he is “period correct” or not. I am looking for companionship in a dog, not period correctness. On that topic, I learned the hard way to never take your​ dog’s collar off when trekking.

On a five-day camp Sprinkles was startled by a herd of cattle and took off running. He never looked back, and it took me 24 hours to find him, well, for a local good Samaritan to drop him off at my truck since he knew where we were. Otherwise, he would have probably gone home with someone, and I would have never seen him again. If you want to make a rustic leather collar, I highly recommend it, but leave your contact information on your dog!

Dogs are great in camp, and I highly recommend a camp dog. Sprinkles has a lot of nights under his collar and has made a lot of friends along the way. If you see him in camp, come say hello!

Written by Gerry "Lucky" Messmer. Reprinted with permission from the author.

Code: trk01 glm01

Wednesday, February 14, 2024

Lucky's Trekking Tips - Muzzle Blasts December 2023

Saddle Up! This month we will look at saddles and blankets, which are important for horse and rider. Let’s start by talking about what’s underneath, the blankets. When trekking horse saddle blankets have two uses. First, to protect the horse and second, your bed pad. They make great padding under you at night and can provide a higher level of comfort than foot trekking.

For fur trade era the only choice is wool, which is probably the best choice of all options even in today’s market. You can find a lot of information about how thick they should be, but I like about 1 ½ inches. My base blanket is the light brown one, with a small wool blanket folded in half that goes over top hanging down further. I have found this to be a great combination to protect Bubbles and for me to sleep on. The key to blankets is really the comfort and protection of your horse.

There aren’t a lot of options to ensure you have a proper, period correct saddle as there are almost no known surviving saddles. This is where you must defer to the people who have done extensive research. My saddle was built by Mitch Alexander, the man I consider to be the expert in period correct saddles of the fur trade era and beyond; and he builds and rawhides them. His research for the St. Louis Saddle came from studying the books, Man Made Mobil by the Smithsonian and The American Military Saddle, 1776-1945, Dorsey, Stephen R. & Kenneth L McPheeters. Mitch also uses various paintings from Alfred Jacob Miller. The main design came from a sketch in Man Made Mobil of what the Smithsonian believes the Thornton Grimsley saddletree looked like.

Mitch has been building saddle trees for more than 30 years, so for a proper saddle, he is the go-to guy at Old Time Saddlery. If you are serious about getting a saddle, he gave me permission to include his contact information here: 608-732-7460, alexandersaddles@hotmail.com. His work is superior, and you will never need another saddle!

Pictured are my saddle and another Mitch built as close to the St. Louis style as possible. They aren’t fancy and they surely don’t have gel cushions! Mine has a simple buffalo epishemore over the top for a bit of added comfort. I built and added tapaderos to my stirrups. These are fantastic in all conditions. In the sage brush of Wyoming, they protect your feet and in the cold winters of the east they help keep your feet warm. Additionally, hanging over my saddle horn is an oilcloth tarp that always rides there. In the rain I unroll it to cover my saddle and gear that is tied to my cantle.

Underneath is a Mitch Alexander handmade mohair cinch with brass rings. My saddle has adjustable rigging. While trekking, if her underside gets sore, I can move the cinch forward or backward to give Bubbles relief.

I know this is a very brief over-view, but if you really want to trek by horse, you can contact me for help, or I can point you to someone in your area. It is a real game changer and more fun to trek by horse! I hope to see you looking over your horses’ ears in the future.


Written by Gerry "Lucky" Messmer. Reprinted with permission from the author.

Code: glm01
Wednesday, January 24, 2024

Lucky's Trekking Tips - Muzzle Blasts November 2023

Heads Up: Last time we got together around the fire we talked a little (about) horse philosophy. It is hard in a one-page article to get into depth, so I try to hit pertinent things. Remember, you can always contact me with questions at amm2046@reagan.com.


Today we start at the front of Bubbles. Like any other genre of riding, we use a bridle and halter. One difference between trekking and pleasure riding is control. When pleasure riding typically it is a few hours, tacking and untacking in a controlled environment, most likely a barn or stall. But when horse trekking you will lose that control and will be doing all the work out in the open. That leads me to answering the question I get most often by modern riders. Why is the halter (attached) underneath the bridle?

I get asked because modern riders will almost always remove the halter to put on the bridle. When horse trekking you are out in the wilderness and need to control your horse for those unforeseen circumstances that may spook them. Without a halter and lead rope, if your critter spooks, they are GONE! Additionally, it makes it easy to pull (off) the bridle and hold your horse while they graze on a break.

If you fall off, you need to be able to grab the lead rope that is tucked into your belt as many riders do. I daisy chain mine and let it hang. I have only ever had to intentionally bail off Bubbles once due to what I believe was black bear scent spooking her and my wife’s horse. When I got off, she did not move, but waited for me. That is due to her training, a lot of horses will run off.

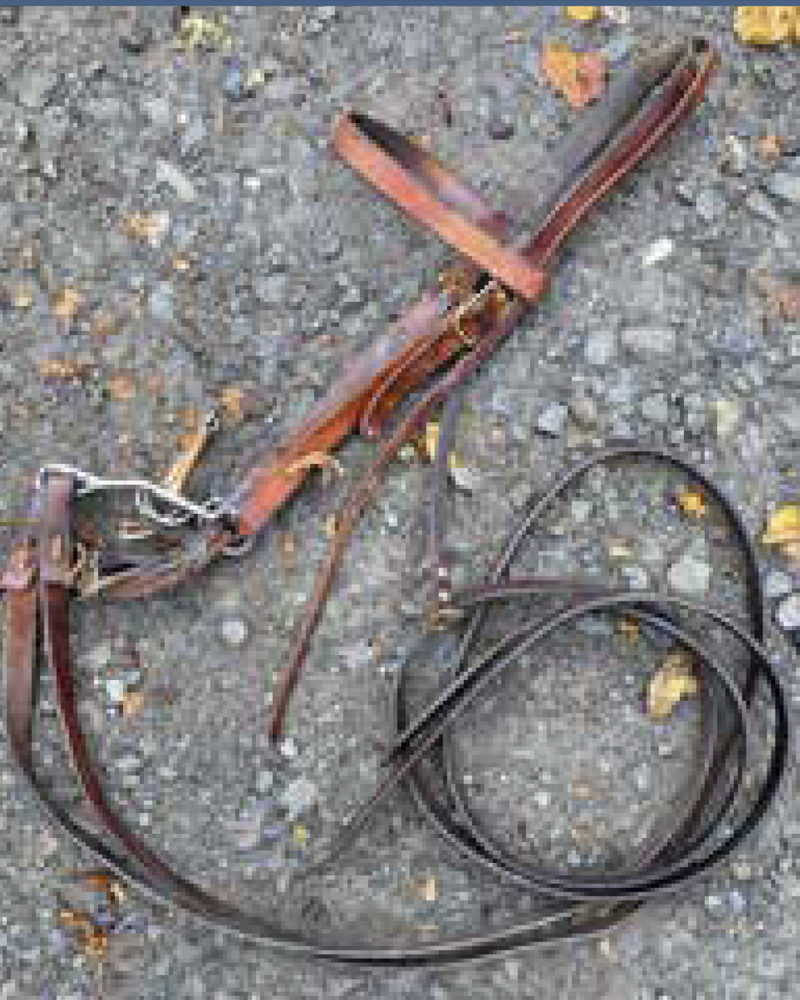
The halter pictured I made myself. It isn’t pretty, but it is based on period drawings and fit to her head. The cute braid on the front makes it smoother across her nose but is a real pain to do! Over that is the halter, handmade by my good friend “Black Powder” Jim Branson. He gifted Bubbles to me. Jim is a superb tack maker and people often mistake his hand sewing for machine sewing. He is very meticulous about stitch spacing and quality as a lifelong horseman and tack maker.

The pictures show you Bubbles posing nicely to display the bridle over the halter and how I tie off my lead rope. On long treks and in sketchy areas I too, will tuck the lead rope into my belt; you can never be too sure. The individual pictures will give you an idea of design.

As for what bit to use, people will argue that you must use a period bit. However, I say this, your horse doesn’t know what year it is and it is not reenacting, but working, so you really need to use the bit that your critter is used to, trained on and gives you control. Never sacrifice safety and comfort of the animal over something as trivial as a bit.

I sure hope this helps you out and perhaps our next chat will be around a real fire - well after the snow is gone!


Written by Gerry "Lucky" Messmer. Reprinted with permission from the author.

Code: glm01

Wednesday, July 10, 2024

Lucky's Trekking Tips - Muzzle Blasts June 2024

Eastern Cottonwood

The Birds Nest: When it comes to plant and tree identification, I am not the best at it. However, the one tree I have learned to identify is the Western and Eastern Cottonwood. On our Ashley’s Return Trip, we saw them, naturally, along the waterways we traveled. What makes them special is their inner bark, which I have pictured. It is unsurpassed for making a lifesaving bird's nest for a fire.

As a plus the inner bark of western cottonwood was used by Native Americans to feed their horses during the long cold winter. Many trapper journals talk about feeding their critters bark to keep them alive. 


Western Cottonwood
For the natural medicine folks, the bark is also called “Balm of Gilead.” A compound within it is salicin, found in the leaves, buds, and bark, lowers fevers, reduces inflammation, and eases pain. Cottonwood bud oil is a favorite remedy for swollen arthritic joints and sore muscles. 


This inner bark is like super dry paper and takes a spark well, burning hot so you can feed it with twigs to build up your fire. After returning from our journey, I took to the woods to find the Eastern Cottonwood and it is almost identical to the western cottonwood. There are plenty of them on the ground to pull back the outer bark and harvest the wooden gold underneath.


I highly recommend always carrying an oilcloth bag with you to save dry material for fire starting. I have one about eight inches long and 4 inches in diameter stuffed with the inner bark of both western and eastern Cottonwood. In the past, in the east I have used tow. Tow is an acceptable material for Longhunter’s as it was a common item and available. Others use unraveled rope, although most modern rope is treated for fire resistance and generally not usable. Some older rope is still ok as I have a bit of it. 


On some trips I have used a real bird’s nest when I can find them. When the leaves are still on, they are quite hard to find, but after fall it seems they just pop out everywhere! 


If I see a very tiny hummingbird nest, I do leave that alone. In the end, cottonwoods seem to be everywhere.


It was great seeing many of you at Fort Frederick and The Hawken Classic. My next event is the Gunmakers Fair at Kempton where I will be doing a horse trekking seminar. Hope to see you there!


Written by Gerry "Lucky" Messmer. Reprinted with permission from the author.

Code: glm01


Wednesday, August 21, 2024

Lucky's Trekking Tips - Muzzle Blasts August 2024

Fishing: Many journals mention fishing and as a means of survival, it is an age-old method to gather very nutritious food. Once again, I am not the expert and a pretty decent fisherman at best. I am sharing what others have taught me. The tackle box I use was made by Carl Giordano, Tinsmith and they are available on his website at: www.cg-tinsmith.com. Like all things Giordano, it is copied after an original and works great.

The interior gear I bought from the only real expert at period fishing I know, Paul Waggoner Jones. He has been a student of period correct fishing his whole life, he can be found on Facebook under his name. He developed the cards for the knots that I carry in my tackle box, and they are a must have until you memorize them.

Period gear is not much different from modern gear except for all period hooks were spade type hooks as pictured. You can still buy them online today. They are more difficult to tie the line to, but once you have the hang of it, they work just as well as modern hooks. Bobbers aren’t much different, and the lead sinkers are just a different shape. They too, used ribbon lead for sinkers as some of us still do.

The linen line is very strong for the diameter. When fishing for crappie or smaller fish you can always use a two-to-three- foot length of braided horsehair from a tail as a leader. Otherwise, I simply tie the hook onto the linen line. Fishing rods of the day were simply a fresh cut willow or other type of flexible sapling. Tie the line to the small end of the sapling and toss your bait in.

I use about 10-12 feet of line. Anything more is hard to get out into the water and you really don’t need to get that far out. At the Hawken Classic this past May, I watched modern fishermen catching catfish on the Missouri River no more than 8-10 feet away from the bank. One was 54 pounds! Now that’s a meal!

If you really want to get deep into this, research period flies for fly fishing as well. Fly fishing and fly rods go way back and Paul could really blow your mind with his information on fly fishing and coarse fishing in general.

When trekking we cannot always go during hunting season, so this is a nice alternative to be resourceful and catch some dinner or even breakfast. Back in Texas we did a summer fishing camp every August and did our best to catch whatever we could on the Guadalupe River. If you have never done coarse fishing, give it a try and expand your skill set, it is a lot of fun! See you around a fire and keep your powder dry.


Written by Gerry "Lucky" Messmer. Reprinted with permission from the author.

Codesglm01 hunt01

Wednesday, October 18, 2023

Lucky's Trekking Tips - Muzzle Blasts, August 2023

The Cutting Edge. Hello again my friends! I hope this issue finds you well and enjoying the summer getting out on the ground. I have seen many of you at Friendship, The Battle of Monmouth and Guilford Courthouse this year.

Today I would like to cover knives for camp and trekking. There are so many great knife makers out there and I am a sucker for a nice knife. I could probably benefit from a knife addiction recovery program!

Over the years I have narrowed down my camp cutting edges to simple knives and most times I do not take a belt ax, tomahawk, or other hatchet. I see a lot of people expending a lot of energy in camp chopping wood rather than doing other things, even resting for the next days journey. In the woods with a fire, I simply stick the end of a log in, regardless of length and keep pushing it in as it burns. The weight of a belt ax can be replaced with food, water, or any other item of choice. Some will argue they use it to build a shelter. I never have. Tarp, dead logs, small rope in my kit and I’m all set, or flat camp. We did that for 95 days!

When it comes to knives, I’ve narrowed it down to three. First, a heavy duty “work knife” on my belt. I use a loop to hold it and have never been comfortable with just sticking a knife in my belt in the sheath without it being fastened. The one pictured I hand forged as an apprentice under my good friend and Master Knife Maker, Bill Smith of Salado, Texas. The blade is from an original 1800 buggy spring. It is heavy, sharpens easily and has enough weight to do serious chopping in camp.

For finer work, cooking, skinning, and eating I use my neck knife. This knife is a copy of a surviving original Great Lakes Native American neck knife that I made as well. It has a Green River blade, walnut handle and three brass rivets like the original. It is finished off with a sheath and quill work that started out looking “similar” to the original. It is the only quill work I have ever done and most of it is gone. I have a real respect for quill workers! This fella has more than 20 years of use.

Finally, I carry a backup knife in my belt bag. You never know when someone needs to borrow one or you break a blade. This one is an antler handle folder made by my good friend Jim Branson of Texas. It has a razor edge and has served me well for the last 10 years.

The biggest thing about knives is using them and getting extremely comfortable with them for daily use. The more comfortable you are with your blade the faster you can get things done. So, if you are not happy with one, try another until you get the right combination. I have abandoned some knives along the way because their balance, ability to hold an edge or it simply was not comfortable to use.

I sure hope this helps! Stop by to see me at the Gunmakers Fair at Kempton at the end of the month or at the Hawken Classic in Defiance, MO at the end of August! We can swap some stories, enjoy some liquid jollification, and catch up. See you around the fire!

Written by Gerry "Lucky" Messmer. Reprinted with permission from the author.

Code: glm01

Wednesday, March 6, 2024

Lucky's Trekking Tips - Muzzle Blasts February 2024

Keeping Horses: While writing about horse trekking, it dawned on me that even as some may want to own a horse, they think they can’t. People assume they don’t have room, that horses require acreage, big barns, and experience. We knew nothing when we jumped into horses!

We live in a village on 1.5 acres with two horses, chickens, two gardens and at one point four dogs! Before moving horses here, we spent a lot of time talking to our farrier, veterinarian, and other horse experts. We decided to implement a dry lot system. Our area is roughly one tenth of an acre with a 24x12- foot barn/shelter. The shelter for the horses is 12x12 and the enclosed hay storage area is 12x12.

We are fortunate to have friends near us where we can get our hay at a fair price. Using our 16-foot flatbed trailer we stock the barn, which holds about 140 bales. To deal with manure we have three 4x4x4 compost bins to make black gold. Manure mixed with kitchen scraps gives me ample compost to keep my garden and yard vibrant. For a couple years I put heavy amounts on my vegetable garden to enrich previously very poor soil.

Parked near the dry lot is a 6x10 dump trailer we bought used with a ramp I built to empty the wheelbarrow of manure into each day. Amazingly, I have no shortage of people who want a load of manure every 3-4 weeks. Obviously, you will need to be able to tow trailers.

In addition to hay, they get grain twice a day with supplements and have a salt block in the pen. The beauty of the dry lot is you can control their diet. Our tack room is the horse trailer tack area, so no need to clutter the hay barn with saddles. It is a tidy setup and very convenient. We love the horses close to the house and when we can’t ride, we still interact with them at least twice a day when we feed. They are well integrated into the family and our bonding with them gets better every day.

We do have a section of the yard I planted with a forage grass mix where we picket them out on a weekly basis to graze. With many visitors out for a walk stopping to visit they have become more sociable and accustomed to loud vehicles so when we ride along roads they are desensitized to the distraction. They are so comfortable in their dry lot they lie down regularly to get their much-needed REM sleep. Horses won’t lay down unless they feel safe.

Finally, people talk about bedding and the cost of wood chips. We use something you can get free anywhere and people are happy to give it up! Leaves. Just avoid walnut. Instant bedding.

Keeping horses can be simple, compact, and enjoyable. You may see me on the trail this coming year with the 4th Light Dragoons doing Rev War events. Time to try something new! Hope to see you around a fire and happy trails! 

Written by Gerry "Lucky" Messmer. Reprinted with permission from the author.

Code: glm01

Wednesday, May 21, 2025

Lucky's Trekking Tips - Muzzle Blasts May 2025

The Trekking Pard: Last night I was lying in bed around midnight, wide awake after drinking too much iced tea while doing the dreaded income taxes thinking about my next article topic and it dawned on me what to write about, the trekking pard!

I have done treks alone and while a nice break from society, I cannot lie, they are boring! I would rather watch grass grow than trek alone. First off, the safety of having someone with you makes good common sense since you never know when an injury will happen. We all read lots of stories about people out alone and having to do drastic things to survive. Most of the time these things can be prevented with the application of common sense and having a trekking pard.

My great friend Bryan Knapp and I have racked up some time in the woods together having fun and being miserable at times. The pictures in this article are on a particularly cold 5-day winter camp in December. Our only game acquired was a huge raccoon that we ate down to the bone.

Having a trail pard makes miserable not so miserable and fun more enjoyable and memorable. It just so happens that Bryan is a gourmet cook and that makes all the difference. He made that raccoon taste like roast beef, no joke!

Having a trail pard helps split up camp chores and each person brings a different skill set to the woods. Bryan and I can go to town setting up camp and have it done in no time since we think alike and have camped a time or two together. One starts a fire while one gathers wood and then after that we each set up our bedroll, but not until after the team chores are done.

When finding a trekking pard you don’t always have to find someone that is period correct like you are and that’s ok. We all come into this hobby from different angles, and we all start somewhere.

It helps if you live close to each other to make logistics easier. If they are modern, let them come modern. After they see how you do with period clothing, they may want to take the next step, and it makes the time around a fire more enjoyable and the trek safer.

Remember, for us this is a hobby and not our way of life. We must be smart about things, safe and return home to our loved ones and for those still working, to your job and means of making a living. See you in the woods! 

Written by Gerry "Lucky" Messmer. Reprinted with permission from the author.

Code: trk01 glm01

Wednesday, March 12, 2025

Lucky's Trekking Tips - Muzzle Blasts March 2025

Shelters: With winter hitting us all around the country like a ton of bricks, I felt a re-visit of shelters was appropriate. Over the years I have seen so many folks, including me, buy and use a “diamond shelter or plow front”, which I believe is completely period incorrect. It is a shelter I have never seen first-hand documentation of and is in my opinion the absolute worst for warmth and rain protection. Sorry folks, you really should ditch the diamonds to be period correct. If you do not care about being period correct, don’t worry about it.

The diamond shelter is another product of the 1960s rendezvous era for folks looking for a man-packable shelter. One of the biggest mistakes I see in this hobby is people thinking that to emulate fur trappers in the Rockies or Longhunters in the east that they must be able to carry what they need on their back. The reality is that these men were all mounted and with pack animals for their gear. So, a lightweight, man-packable shelter/tarp was not a concern. We make things light weight to man pack because we all can’t have horses. But if you are just going from your car to camp, why not do it properly? 

When packing mules and horses you will always have pieces of canvas to cover your load and to double down as a shelter, not to mention the tents they carried in the Rocky Mountains at times. In fair weather I am sure they merely flat camped as a fast and efficient way to set up camp, I do. In foul weather, certainly more time would have been taken to provide shelter as security allowed.

My “go to” shelter whether alone or with a companion, is an “a frame” with a gap in the middle of 6-8 inches. By putting to pieces of canvas together as to lean-to’s facing each other you can get maximum protection from the wind when positioned properly and space in the middle to build a small fire that will more than keep you warm. The gap at the top allows the smoke to drift straight up like a chimney. You may have to cut branches or pine limbs to block one end if the wind changes, but I have survived extreme cold temperatures and a lot of snowfall very comfortably! When doing fur trade events, I use a buffalo robe along with my wool blankets and have never been cold. My close friend Bryan Knapp and I survived 6 inches of snow and extreme cold during a December hunting camp.

If you are traveling alone, you can carry two pieces of canvas to make the shelter or just one if you set it up with a good reflector wall of rocks or even deadfall limbs. Keep in mind the further away from your shelter your fire is the more inefficient it is. A smaller fire close in is more valuable and provides sufficient warmth while conserving wood. It is nice to be able to cook and feed a small fire that is arms reach away while in your shelter.

The two sketches show how to build the shelter I am referring to. Unfortunately, I have never taken pictures of one from the outside. I usually just take pictures of the inside especially when Sprinkles is with me since he is so cute!

Happy camping and stay warm! See you around a fire in the near future!


Written by Gerry "Lucky" Messmer. Reprinted with permission from the author.

Code: trk01 glm01

Wednesday, August 30, 2023

Lucky's Trekking Tips - Muzzle Blasts, June 2023


Food Storage: Last month we talked about lightweight food for the trail to get through a 3–7-day trek. The next question is how to preserve your food and not let it get ruined in the rain or crossing water? I have played with this for many years myself looking for the “perfect” solution.

One of the things I tried early on and quickly abandoned was storage tins. The problem with tins is that they are hard to pack, packed wrong are very uncomfortable on your back or they can make saddle bags bulky. Additionally, they rust. Once they rust, they can be very hard to open and if they rust on the inside you get to taste that in your food.

I have used the red canvas that is often referred to and sold in various places. While it makes a good-looking bag, I have found that canvas, even if advertised as “water resistant” almost never is after some hard use. So, what are you looking for? The bottom line for me is to be a minimalist, cross-purpose use and waterproof.

Regarding cross-purpose, I am referring to how to carry fresh meat. Last month I talked about how we carried the fresh meat in the cooking bucket in the pack saddle. Well, when on foot, I do the same. In addition to my copper boiler with the ceramic cup that fits inside, I’ll carry another small tin “corn boiler” with a lid. Inside that I wrap my fresh meat in a cotton cloth and put it inside. I can either boil that pot at night before cooking or cook in my small copper boiler. By using the boiler for meat, I can pretty much ensure that my pack will not be soaked in blood. Before leaving I do wash all the blood out and dry the meat before packing it. In extreme cases I leave the ceramic cup at home and use one of my small copper boilers for everything.

For dry food nothing works better than a triple layer system. Pictured are a cotton sack with my oatmeal inside and two oil cloth bags. The pillow ticking bag gets stuffed into one oil cloth bag and I may use a second sack if I think it may be particularly wet. If using a pack animal, boat, or canoe, you can put everyone’s oil cloth food sacks inside a larger one giving it that extra layer. The big bag with the gear pictured is what we used in the pirogue for a month and 400 miles on the river, no leaks. All our individual bags were inside that.

 I do want to touch on carrying medication. Most of us have some that we need to carry, and the tricky part is keeping it dry so when we take it we don’t have a pile of gooey dust.

There are two things I like. One is a brass pill box by TDC Company and the other is a horn box that was gifted to me. The wood top on the horn box is “chimed in” so that it snaps shut and is watertight. I had both in a brain tan bag on my belt and completely submerged when I swam out into the flooded Missouri River to recover our bull boat and they did not leak. If you know a talented horn maker, you can get a box made like I have pictured. Don’t ask me, I’m not that good, LOL!

I sure hope you find this informative and offers you some solutions for food storage. Strike a fire, get some coffee on and I’ll see you in the woods!

Written by Gerry "Lucky" Messmer. Reprinted with permission from the author.

Code: glm01

Wednesday, December 27, 2023

Lucky's Trekking Tips - Muzzle Blasts, September 2023

Trade Guns:  When it comes to what flintlock I take on a trek, it boils down to: what will I be doing? Over the years, the period firearms I have acquired have been totally based on trekking and hunting, not reenacting. I have done, and still do plenty of Revolutionary War reenactments, but 90% of the time my weapons are used in the field with a purpose.

If I am out in the early fall for small game season, my weapon of choice is a .20-gauge smoothbore with swan shot, when I can get it, or number 6 shot. It has rear sights and is deadly on small game. I don’t even carry wadding for it. Instead, I use what I find in the woods. Dried leaves, a cut piece of shelf fungus or some wasp nest if I find it. I don’t believe for a minute they carried the over/under wads on the frontier. Maybe they wealthy had them back in the populated areas, but not your average guy in the wilds. They were not practical and were not readily available. With primitive wadding mine patterns nice and has killed a lot of game. I highly encourage you to go to the woods without modern over/ under wads, etc., and give it a ‘shot’. 

 If I am out later in the fall during deer season, I carry my .50 caliber rifle. It is Jim Chambers a guy built for me and shoots straighter than my eyes are probably capable of. It’s a mere 7- and three-quarter pounds and is easy to carry all day long. I do have a serious hankering for a Hawken rifle in either flint or percussion. The ultimate would be an “Ashley Hawken”, but that original baby came in at almost 13 pounds in .69 caliber! 

 Finally, on horse treks my immediate “go to” gun is my canoe length smoothbore 16-guage trade gun. For those that were at Kempton, I had it there. It has a repaired wrist, tacks, lots of dirt and is ugly as a stump, but shoots every time with great accuracy with either shot or ball. When riding, shorter is better. I carry it in a four-inch-wide sling on my saddle horn or carry it in my lap. It is what I took on the Ashley’s Return trip and it fired every time.

 No matter which one I carry, they all go to the woods with a calf knee over the lock, most of the time, or dangling from the trigger guard. A lot of people are afraid to take a flintlock out in the rain deer hunting. Not me. I have hunted in the pouring rain with a calf knee and not had a miss-fire and I have forgotten the calf knee and still hunted in the rain with a couple miss fires before it went off. However, it is a good lesson in how well you know your gun and your quick response drill when a buck is 40 yards away watching you miss fire twice only to decide to run before the third time, which was a charm, although I missed him. Smart buck. 

Pictured from left to right are my rifle, 20-gauge smooth ‘rifle’ and the 16-gauge trade gun.  No matter what, the one you own is the one you take unless you are fortunate to have a choice. Keep your fire burning and I hope to see you on the trail soon.

Written by Gerry "Lucky" Messmer. Reprinted with permission from the author.

Code: glm01
Wednesday, February 12, 2025

Lucky's Trekking Tips - Muzzle Blasts February 2025

Maple Water: While chatting with my good friend, Greg Bones, of Two Bones Trading, the topic of making Hickory Syrup came up, incidentally, you can make syrup from walnut trees too. The conversation led me to drinking maple water straight from the tree that I have had in the past. Remarkedly, it is delicious!

Trekking tips like this are fun to write about but my intent is for you to take the information and do a deep dive on how it can help you in the woods. Every tidbit of knowledge can make the difference between a successful trip and a bad experience, or worse. If you do a deep dive, focus on the medicinal uses. I prefer natural treatments to relying on modern first aid kits. It’s a skill I am working on.

Since we live in the heart of the Iroquois Nation I decided to research Native American use. They used maple water as a hydrating drink, consuming it directly from the maple tree during the spring sap season and using it as a medicinal tonic to treat various ailments, including arthritis, rheumatism, and as a general spring health booster. They boiled down the sap to create maple syrup for food and as a trade item.

The Iroquois used maple sap to treat eye problems, and the Mohegans used the inner bark as a cough medicine. The picture is of a Native American tap carved by hand, of course. The composition of maple sap is roughly 98% water and 2% sugar. That’s why maple syrup producers boil down 40 gallons of sap to make a single gallon of syrup. It is primarily available in the spring, making it a seasonal drink for Native Americans. While you can drink it straight from the tree, there is nothing wrong with boiling it to be safe. Once you bring it to a boil, let it boil for an additional minute, allow to cool and enjoy. Maple water contains vitamins, minerals, enzymes, amino acids, and polyphenols. It is roughly 2% sugar, primarily sucrose, or table sugar. Maple water, per 12 ounces has roughly 30 calories, 7 grams of sugar, 4% of the daily value of calcium and 40% of the daily value of manganese. Not bad!

Further research found a study in the Journal of the International Society of Sports Nutrition suggests that maple water may help with rehydration. I have done several trips to the woods without food to live off the land and if you have trouble finding clean water or enough food, dehydration becomes a real issue not to be ignored.

It is now being sold on the shelf as a post workout recovery drink. Who knew? Your body loses electrolytes through sweat, which is why sports drinks tout their ability to restore that resource to proper levels after a workout. Maple water is a “natural” version of a sports drink.

Next time you’re in the woods, give it a shot! For those on the east coast, you will most likely find me at a Revolutionary War event as mounted militia or Continental Light Dragoon with Bubbles. I was just at Washington’s Crossing!

Written by Gerry "Lucky" Messmer. Reprinted with permission from the author.

Code: trk01 glm01 food01

Wednesday, May 22, 2024

Lucky's Trekking Tips - Muzzle Blasts April 2024


Hunting Bags: I have always marveled at the amount of stuff people carry in their hunting bag, or as people call it, the “possible” bag. I have never found a historical reference to that term in more than 25 years of research. “Possible bag” came out of the 1960’s rendezvous era when all kinds of crazy things surfaced that have no historical existence.

First person documentation lumps the bag, horn, and knife into their historical term, “hunting tools”. A lot of us carry the same three items for fashion and not function. Sometimes I walk around camps and the only thing I can think is, “he with the prettiest accoutrements wins”. But are they functional?

When it comes to my hunting bag, it has very little in it, and what is floats around freely. My horn rides on the flap to keep it closed and the bag rides high under my arm to keep it from bouncing around, especially when on the run, both foot and horseback.

Inside is loose ball, patching material, and a couple flints. In a hurry, the last thing I want is to reach into my hunting bag, to pull out another bag to get at ball or flint. I have read journals that talked about loose ball in the bottom of their bag, and so I do. Once in a great while I will have a flint and steel in there with char cloth in a tin, but usually that is in my saddle bags. When I am on foot my fire kit is in my haversack. Keeping it simple makes rapid reloading a snap.

Pictured are the only bags I have ever owned. The first is an Eastern Native American bag acquired from my first mentor in the hobby, Ron Poppe, when I was with Captain Benjamin Logan’s Company of Kentucky County Militia. The heart bag I made along with the patch knife on the side. It is hand forged from an 1800’s buggy spring.

The last one is my favorite, a beaver tail bag made by Jeff “Po-Boy” Luke. He is one of the finest bag makers in the country and I carried this bag on my Ashley’s Return trip for 95 days in all conditions. The bags performance and craftmanship is impeccable. The two pictures are of it before and on the trek.

When trekking, I have a strip of patching material hanging from the strap. I don’t carry patch lube (neither did our forefathers) and very rarely a loading block, only recently adding one to a bag. It was made by Spark Mumma, good friend, and superb craftsman. Hanging from each bag is a vent pick, brush, and powder measure. That’s it. It is a hunting bag, not a purse or haversack. For me it has a simple function to load and shoot, period. Not to hold everything “possible”.

I am looking forward to seeing folks at Friendship this June. I’ll have a fire and coffee on, stop by for a chat!

Written by Gerry "Lucky" Messmer. Reprinted with permission from the author.

Code: glm01

Wednesday, May 8, 2024

Lucky's Trekking Tips - Muzzle Blasts March 2024

 Canteens have been around for ages in many forms and the military has used them nearly continuously in every era. There is a question of whether the mountain men of the fur trade carried them. My belief is that they did not, as I have never read a journal that mentioned them, but that doesn’t make me right! Water is plentiful in the Rocky Mountains and carrying water seems pointless and unnecessary weight considering they were trapping beaver in water.

  Today, however, regardless of where you go a canteen is a necessity and even packing away a small water purifier if you are in a remote location. In the days of yore, they did not have to deal with the pollution we do, whether animal, factory, or pesticides. On our Ashley’s Return trip, we carried water purifiers and used them, at times, no more than 20-30 feet downstream from animals urinating in the water!

 While horse trekking, I recommend tin lined copper. There are several makers, but copper is rugged and can take a beating. I carry two with leather covers and adjustable straps to hang off the pommel. When I do Revolutionary War events, I carry the proper tin canteen for a militia soldier. Those I cover with wool and attach a strap to carry over the shoulder. The one pictured is a Hessian canteen with a lid that is a cup.

 When horse trekking, you can carry bulk water on the pack critter. Use a one-gallon size for cooking, coffee and refilling personal canteens. Pictured are some canteens I have carried over the years. I do not recommend wood. If you use wood, it will last about as long as the originals, 6 months or so. When trekking away from a clean supply of water, carry a water purifier! Unless you are 100% sure of the water source, it is better to be safe than sorry. Buy the best purifier you can afford and replacement filters. Make a pillow ticking bag and tuck it away in your gear.

 We carried two for six men and that seemed about right. While boiling water eliminates bacteria in the water, it does not make the water pure. Water can contain other contaminants such as microplastics, pesticides, fertilizers, industrial chemicals, hormones, medications, heavy metals, and neurotoxic microorganisms which are not removed through boiling water. You will thank me one day for this tip!

My first event of the year will be Guilford Courthouse and I hope to see some of you there for a cup of coffee around my fire. If you are in the area stop by. Happy trekking in 2024! 


Written by Gerry "Lucky" Messmer. Reprinted with permission from the author.

Code: glm01